Exterior Painting in a Calgary Fall: Where the Temperature and Dew Limits Really Sit
By firozkhangoury 12-10-2026 3
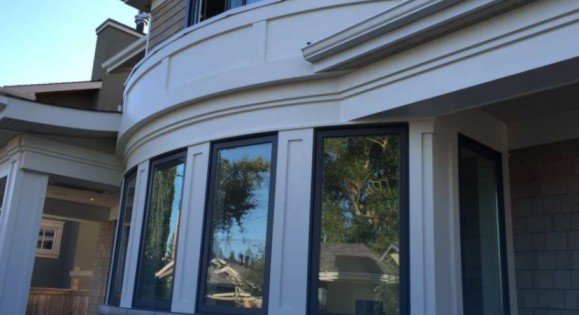
A fall coat can look perfect on Friday and be peeling by spring if the wall was cold or damp when it went on.
Here is what we see every October. A house gets painted on a bright afternoon, the colour looks sharp, and by the following spring the paint is lifting in sheets. The afternoon was fine. The wall was not.
Exterior paint is a film that has to cure on a surface, and cure depends on the temperature of that surface, not the air. A wall in shade can sit well below the number on your phone. This article covers the limits, the dew problem, the prep that matters on stucco, wood and fibre-cement, and the day you stop for the season.
Read the can, then read the wall
Every exterior paint label lists a minimum application temperature. Read it, and then notice that it applies to the surface and the air, and that it usually also applies for a stretch after the coat goes on. Paint does not finish curing when it feels dry to the touch. It keeps hardening for days.
Calgary fall makes this tricky. A Chinook can push the afternoon air up for a day, then a clear night drops it right back. The wall absorbs the warmth slowly and gives it up quickly. By the time the sun leaves the west side of your house, the surface is already cooling.
A cheap infrared thermometer settles the question. Point it at the wall, not at the air. If the surface reads near the label minimum before you start, you will be chasing the limit all afternoon. That is a day to wait.
Why frost on the wall at dawn ruins the coat
Dew point is the temperature at which moisture in the air condenses into water on a surface. When a wall cools below it overnight, a film of water forms. In a Calgary fall, that film often turns to frost.
You can paint over a wall that looks dry at ten in the morning and still trap that overnight moisture behind the coat. The paint skins over the top. The water underneath has nowhere to go. It pushes outward when the sun warms the wall, and you get blisters.
Frost causes a second problem. Paint applied over a frozen or just-thawed surface never bonds properly, because the film cannot wet the substrate. It sits on top like a sticker. The first freeze-thaw cycle breaks the grip.
- Check the wall surface, not the air, before the first brush stroke.
- Wait until frost and dew have fully burned off the wall you are about to paint.
- Stop early enough that the coat is not caught by evening dew before it sets.
- Watch the overnight forecast, because a coat that gets rained or frosted on in the first night can fail.
The evening is the part people forget. A coat applied at four in the afternoon in October may have only a couple of hours of useful warmth before the wall starts to chill. Work the sunny sides first and chase the light around the house.
Stucco: let it dry, then fix what is open
Stucco is a cement-based finish over a base coat. It is porous, which means it holds water. A stucco wall that has been rained on needs real time to dry out before paint goes on. Paint over damp stucco and the moisture will push the coating off from behind.
Look for hairline cracks first. A crack that is wider than a hairline will take in water, and paint alone will not bridge it. Patch it with a stucco-compatible filler, let it cure, then spot-prime the patch so it does not flash through the finish coat.
Check for efflorescence, the white chalky deposits that salts leave behind when water moves through the cement. Brush it off and find where the water is coming from. If you paint over it without fixing the source, the salts return and lift the paint.
Finish with a masonry primer where the surface is bare or chalky. A chalky wall leaves white powder on your hand. Paint will not grip powder.
Wood: scrape, sand, prime the bare spots
Wood siding, trim and fascia take the worst of the weather. The paint on the south and west faces tends to fail first, because those walls get the sun and the wet cycle most often.
Scrape anything loose, and keep going until the edge of the remaining paint is firm. Feather the edge with sand paper so you do not see a ridge through the new coat. Then check for soft wood. Push a screwdriver tip into the board near the bottom edge and joints. If it sinks in, the board is rotting, and paint will only hide it for a season.
Bare wood needs a primer made for exterior use. Prime every bare patch, and pay attention to the end grain and the bottom edges, where water enters. Back-priming a new board before it goes up helps even more.
Caulk the joints that move, such as trim to siding and around window casings. Use an exterior caulk that stays flexible. A hard filler will crack the first time the board expands in a Chinook.
Fibre-cement: clean, check the edges, use the right primer
Fibre-cement board is stable and takes paint well, but it is not forgiving about prep. Wash it first. Dirt, mildew and the fine film that builds up on a wall will stop paint from bonding.
Let it dry fully after washing. Fibre-cement soaks up water, and a board that feels dry on the face can still hold moisture in the body. A good rule is to give it a couple of dry days, longer in cool shade.
Inspect the cut edges and the bottom edges of each board. Factory edges are usually sealed. Field cuts are not. Seal any raw edge with primer before the finish coat, or water will wick in from the end and break the paint line.
Then check the nail heads and the caulk lines. Fibre-cement moves very little, so a failed caulk joint usually means water got behind it. Fix the joint, not just the paint.
Tools and timing on the day
Brushes and rollers handle cool weather better than sprayers, because paint thickens as it chills. Thick paint goes on heavy and cures unevenly. Keep the cans indoors overnight and bring them out a little at a time.
Plan the sequence by the sun. Start on the east wall in the morning once the frost is gone. Move to the south, then the west. The north wall in fall often never warms enough, so leave it for the last warm day or for spring.
When to stop for the season
There is a day each fall when painting stops being sensible. It is not a date on the calendar. It is when you cannot get a full day above the label minimum, with a dry wall and no frost on the morning after.
Short November daylight makes it worse. The warm window shrinks to a few hours, and the wall never fully dries between dawn frost and dusk chill. Pushing through that stretch is how coats fail.
If the forecast shows a cold snap coming, finish what you can prep and prime, protect it, and stop. Prep done properly in October is not wasted. It lets painting start the first warm week in spring, on a wall that has had winter to show you where it leaks.
Be honest with yourself about what the paint is protecting. A wall with an open crack, a soft board or a failed caulk joint needs a repair first. A fresh coat over those is cosmetic, and winter will find the weak spot anyway.
The short version before you book anyone
A good fall paint job comes down to three checks. Is the wall surface warm enough, is it fully dry, and will the coat get enough hours before the evening chill? If the answer to any of them is no, wait.
Prep decides how long the paint lasts, and the weather decides whether you can apply it. If you want an outside crew to look at your walls and tell you which of those two problems you have, exterior painting in Calgary is covered on the JM Contracting painting page, including how it fits with stucco, siding and trim work.
Whatever you decide, do the repairs before the paint, and do the paint when the wall is ready, not when the calendar says it is time.
About the author: this article was contributed by the team at JM Contracting ( jmcontractinginc.com ), a fully insured and bonded exterior and building-envelope contractor serving Calgary since 1999. The crew handles painting alongside stucco, siding, windows, soffit and fascia, eavestrough and insulation work.
Tags : .....