RV Hatch Lift Kit Guide: How to Choose, Install, and Maintain the Right Lift System
By joefaison 04-09-2026 1
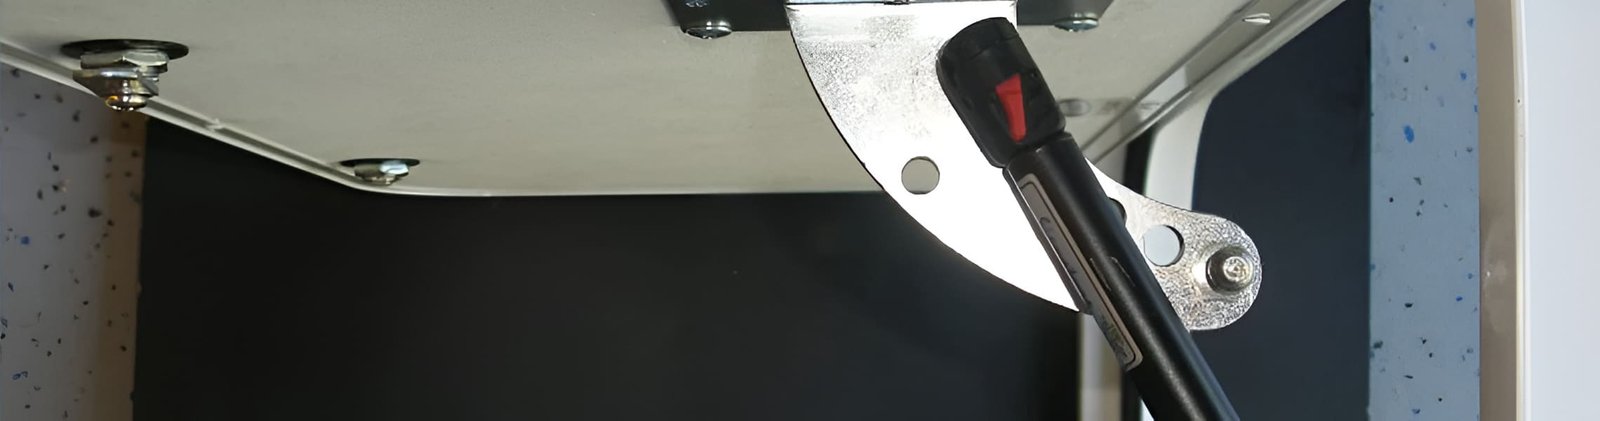
RV compartment doors give you convenient access to tools, camping equipment, hoses, outdoor gear, and other items stored outside your RV. But if you have ever tried to load or unload a compartment while holding the door open with one hand, you know how inconvenient it can be. An RV hatch lift kit provides a simple way to make these doors easier to open and keep them securely open while you use the storage space.
A gas spring lift-assist system uses a pressurized gas spring and mounting hardware to support the door as it opens. For lightweight RV baggage and compartment doors, the right lift system can make everyday storage access considerably more convenient. Hatchlift Products offers retrofit kits designed for Fifth Wheels, Travel Trailers, and Motor Homes, with different sizes available according to door height.
What Is an RV Hatch Lift Kit?
An RV hatch lift kit is a lift-assist system installed on an exterior compartment door. Instead of relying on a prop rod, bungee cord, or another temporary method to hold the door open, the gas spring provides controlled assistance as the door is opened and helps keep it in the open position.
The basic idea is simple. One end of the gas spring connects to the RV structure and the other connects to the compartment door. As the door is opened, the gas spring extends and provides lifting assistance. When the door is closed, the spring compresses and provides controlled resistance.
For RV owners who regularly use exterior storage compartments, this can turn an awkward two-handed task into a much easier one.
Why Consider a Lift System for Your RV Compartment Doors?
Exterior storage is one of the most useful features of an RV, but the doors themselves are often overlooked. A door may be easy to open but difficult to keep open, particularly when you're carrying equipment or working inside the compartment.
A lift-assist system can help with several everyday situations.
Easier Access to Storage
When a compartment door stays open by itself, both hands are available for loading or removing equipment. This is especially useful when handling larger items that are difficult to manage with one hand.
No Need for Temporary Door Props
Many RV owners use improvised solutions to hold compartment doors open. A stick, bungee cord, or other prop may work, but it has to be positioned every time the compartment is opened. A properly installed gas spring becomes part of the door system.
Controlled Door Movement
The gas spring helps support the door as it moves through its opening and closing range. This can make the door feel more controlled than simply allowing it to move freely.
Useful Around Tight Campsites
RV compartment doors don't always have unlimited clearance. Nearby slide-outs, equipment, walls, or other obstacles can affect how a door can be opened. A properly positioned lift system can provide a more practical way to manage the door.
How to Choose the Right RV Hatch Lift Kit
Choosing the correct size is one of the most important parts of installing a lift kit. A larger spring is not automatically better, and selecting the wrong size can affect how the door operates.
For the Hatchlift RV Door Lift Kit, sizing is based primarily on door height, not door width. The current system is available in five sizes for lightweight compartment doors ranging from 14 to 44 inches tall.
Start by closing the compartment door completely. Measure from the top edge of the door to the bottom edge. This measurement gives you the door height needed to select the appropriate size.
There are a few additional considerations.
Check the Door Width
If the compartment door is more than 27 inches wide, Hatchlift recommends installing a kit on both sides of the door. In that situation, two kits are required.
Check for a Slam Latch
A slam latch adds resistance when the door is being closed. If your compartment door has a slam latch, the next size up should be selected from the normal door-height recommendation.
Consider the Door Construction
These kits are designed for lightweight RV baggage and compartment doors. They are not intended for heavy, reinforced, or solid wood doors.
It's also important to distinguish between a new lift-assist installation kit and a replacement gas spring. An RV hatch lift kit is designed to add a lift system to a door that does not already have one. If an existing lift system needs a replacement spring, a replacement gas spring is the appropriate type of product.
What Comes With an RV Hatch Lift Kit?
The exact components can vary by kit, but the current Hatchlift RV Door Lift Kit includes the gas spring, mounting plate with pre-applied 3M adhesive tape, wood spacer block, mounting hardware, ball stud and quick-connect fitting for slide-out applications, and installation instructions.
The mounting plate is particularly useful on RV compartment doors where there may not be enough solid material for conventional mounting.
Before beginning the installation, it's worth laying out all of the components and reading the instructions. Take a few minutes to understand where each mounting point will go before attaching anything permanently.
How to Install an RV Hatch Lift Kit
Get the complete installation guide here:- RV Hatch Motor Home Magazine News, Tips and Product Guides.
Installation begins with careful measurement and positioning. The mounting locations need to be correct because the gas spring must be able to move freely throughout the door's range of motion.
1. Prepare the Mounting Area
Clean and dry the surface where the mounting plate will be installed. Proper surface preparation is important for the adhesive-backed mounting plate.
2. Position the Mounting Plate
Follow the measurements and installation instructions supplied with your particular kit. Position the plate carefully before pressing it into place.
3. Install the Door-Side Hardware
Attach the wood spacer block and associated hardware to the interior door panel at the appropriate mounting location.
4. Connect the Gas Spring
Connect the gas spring between the two mounting points. Make sure both connections are secure before operating the door.
5. Test the Door
Slowly open and close the compartment door and watch the gas spring throughout its movement. Check for interference, binding, unusual pressure, or contact with surrounding components.
The current Hatchlift installation information states that most installations take approximately 30 minutes and require basic hand tools such as a screwdriver, drill, and measuring tape.
Installation Tips That Can Make a Difference
The quality of the installation matters just as much as selecting the right kit.
Don't rush the measuring stage. Before making permanent attachments, check where the gas spring will sit when the door is both closed and fully open.
Make sure there is adequate clearance around the spring and brackets. The gas spring should not rub against the door, frame, trim, wiring, or other components as the door moves.
If the compartment is part of an area with a slide-out, pay particular attention to clearance and the correct mounting configuration. Hatchlift kits include hardware intended for slide-out compartment-door applications.
Most importantly, don't assume that every RV compartment door is constructed the same way. Door materials, framing, latches, dimensions, and available mounting surfaces can vary considerably between RVs.
Maintaining Your RV Hatch Lift System
Once installed, an RV hatch lift kit does not require complicated maintenance, but it is worth checking the system periodically.
Inspect the mounting points and brackets to make sure they remain secure. Look for loose hardware, damaged brackets, or anything that could interfere with the movement of the gas spring.
Pay attention to changes in the way the door operates. If a door that previously opened smoothly becomes difficult to lift, no longer stays open properly, or develops unusual movement, inspect the lift system and mounting points.
Keep the mounting areas clean and avoid putting unnecessary loads on the gas spring or using the gas spring as a handle.
Common Mistakes to Avoid
One of the most common mistakes is choosing a kit based only on the width of the compartment door. Hatchlift's sizing system is based on door height, while width determines whether a second kit is needed for doors over 27 inches wide.
Another mistake is choosing a kit without considering the door's latch. A slam latch adds resistance, so the next size up is recommended.
It's also important not to install these kits on doors outside their intended application. Heavy or reinforced doors require different considerations, and the Hatchlift RV Door Lift Kit is designed for lightweight RV baggage compartment doors.
Finally, don't confuse a new installation kit with a replacement gas spring. If your RV already has a lift system and only the spring has failed, you may need a replacement component rather than an entirely new kit.
A Simple Upgrade for Everyday RV Use
An RV hatch lift kit is a relatively small addition, but it addresses a problem RV owners encounter frequently: keeping an exterior storage door open while accessing the compartment.
The key to getting the best results is choosing the correct size, checking the door construction, planning the mounting position carefully, and testing the completed installation before regular use.
For lightweight RV compartment doors, a properly selected gas spring lift system can provide a cleaner and more convenient alternative to temporary door props and manual supports.
Whether you're preparing your RV for another camping season or simply tired of fighting with a compartment door every time you need something from storage, taking a closer look at the lift system may be a worthwhile upgrade.