“This article prepares readers for a deep tissue RF microneedling session, outlining essential pre treatment skin prep, a step by step breakdown of the procedure, what to expect during the 72 hour recovery phase, and a realistic timeline for costs and final results. “
In recent months, there has been an unprecedented surge in demand for advanced non invasive skin tightening treatments in New York City. This is because topical anti aging serums have an inherent biological ceiling they eventually hit due to prolonged use over time. This can create skin concerns, such as a softening jawline or deep acne scars, that require sub dermal tissue remodeling (the gold standard) in order to correct.
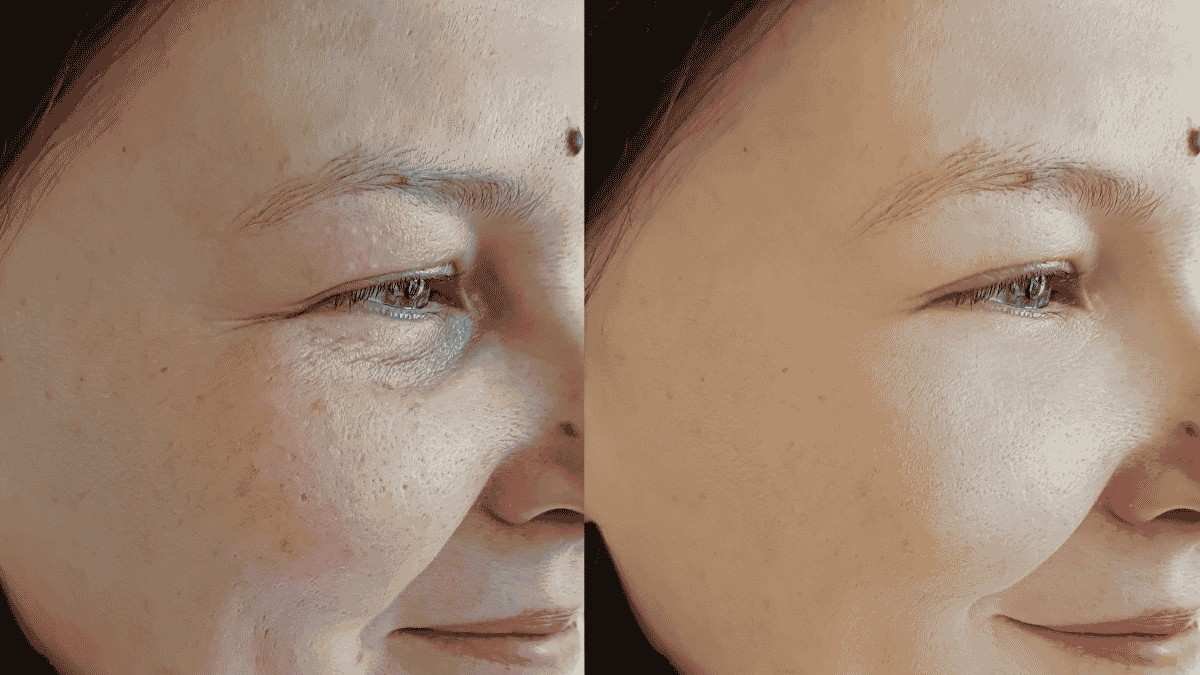
Using a combination of the mechanical triggers of microneedling and localized radiofrequency heat, morpheus8 NYC practitioners utilize this technology to encourage your body to create a completely new matrix of collagen and elastin (new skin) in a similar way as it would naturally repair itself if you damaged your skin through injury. If you are considering making your first appointment to try this advanced skin tightening treatment, we walk you through the process step by step so you know what to expect and how to be best prepared.
Phase 1: Pre Care and Skin Preparation
Your appointment starts days before you enter the clinic. To determine your eligibility, a licensed clinical specialist will analyze your facial anatomy, skin thickness and structural goals during an initial consultation. For patients dealing with more advanced skin laxity, this is often the moment they weigh the structural differences of Morpheus8 vs. a traditional Facelift in NYC to decide if a non-surgical path will truly achieve their goals.
To prevent hyperpigmentation and minimize bleeding, you must adhere to a strict pretreatment protocol:
- Shelve the Actives: Discontinue all retinoids, glycolic acids, salicylic washes and harsh chemical exfoliants three to five days before your visit
- Cool the Tan: Avoid direct, unprotected sun exposure, sun lamps, or tanning creams for a minimum of two weeks
- Watch Your Blood Thinners: Avoid alcohol, aspirin, ibuprofen and high dose vitamin E supplements for 48 hours prior to help minimize potential bruising
Phase 2: What Happens Inside the Treatment Room
A standard session spans roughly 90 minutes. However, the device itself is only in contact with your skin for a fraction of that time; the vast majority of your visit is dedicated to patient comfort and preparation.
1. Prescription Strength Numbing
After thoroughly cleansing your face, your practitioner will apply a thick layer of medical grade topical numbing cream. You will rest in a treatment room for 45 to 60 minutes to allow the local anesthetic to fully desensitize the nerve endings in the dermal layers.
2. Sterilization and Mapping
Once your skin is numb, the clinician removes the cream and disinfects the skin using surgical grade alcohol. They will frequently map out the treatment zone using a medical marker to ensure even coverage across your cheeks, jawline, or neck.
3. The Active Pass
The provider moves the device across your skin in a rhythmic, stamping motion. The insulated micro needles pass through the outer skin barrier to a customized depth ranging from 2mm to 4mm or deeper where they release a precise pulse of radiofrequency thermal energy.
An Honest Assessment of Sensation: It is true that the numbing cream takes most of the pain from the laser but you will also feel some discomfort from the procedure itself. Some patients describe feeling a sharp, hot and annoying feeling when needles go across the bony contour areas of their forehead, chin and other bony areas. However most will say that the experience was fairly tolerable throughout the entire procedure that's still slightly uncomfortable but not overly so.
4. Immediate Soothing
The moment the final pass is complete, your skin will radiate heat. A clean, highly concentrated serum like pure hyaluronic or Platelet Rich Plasma is applied immediately, followed by cooling mask to reduce skin temperature.
Phase 3: The First 72 Hours of Healing
After leaving, your skin will be very red, hot (like a severe burn!) and stretched tight. You may see some minor swelling, small bruises (like when you take the needle out), and also will see that the healing process is underway as evidenced by the appearance of many small grid patterns from the needles.
- Do Not Wear Makeup: Do not use any make up, tinted moisturisers or any other day to day make up products for 24 to 48 hours after your treatment. The micro channels will remain open; adding foreign objects can expose you to bacteria, and trap irritation
- Eliminate Your Routine: Only use a bland/non foaming cleanser and a plain barrier repair cream with ceramides or squalene
- Protect Yourself With Sunblock: Do not be in direct sunlight. Starting the day after your treatment, use a broad spectrum physical sunscreen with an SPF of 30 or higher on a daily basis
Conclusion
In premium metropolitan markets, individual sessions typically range from depending on the surface area treated. Because cell remodeling is a compounding process, a primary series of three treatments spaced four to six weeks apart is generally recommended for optimal structural tightening.
There is an immediate temporary plumping effect that occurs from the inflammation caused by the injection. However, there is an overall need for structural remodeling to take place, and that process does take time. The average time frame for human tissue to create new collagen fibers is 21 to 28 days. You will start to notice a firmer jawline and smooth skin at the three week mark, but the optimum and longest lasting skin tightening will develop fully at around three months's post injection.
Disclaimer
This article is intended to educate readers about different types of medical treatments; however, it should not be relied upon as a medical consultation. Always seek the advice of your doctor before trying any of these therapies in order to ensure that you have the right therapy for you.
Tags : .....