If you’ve ever worked on a roof, scaffold, ladder, or any elevated platform, you already know one thing: height doesn’t forgive mistakes. Most accidents don’t happen because someone “didn’t know what to do.” They happen because someone assumed their gear was fine and skipped a quick check.
A harness, lanyard, or SRL can look perfectly okay at first glance. But small damage — like a tiny cut in the webbing, weak stitching, or a connector that doesn’t lock properly — can become a big problem when your full body weight depends on it.
That’s why a quick pre-use Fall Protection Inspection is one of the smartest habits you can build. It doesn’t take long, and it can literally save your life.
Why a Quick Pre-Use Check Matters So Much
Let’s be honest: on a busy job site, people are in a rush. There’s always pressure to start quickly, finish early, or “just get it done.” But fall protection gear goes through a lot — it gets thrown in trucks, dragged across surfaces, exposed to sun, dust, moisture, chemicals, and sometimes even heat from welding or grinding.
Even if your equipment was inspected last month, it can still get damaged today. That’s why pre-use checks are so important. They catch problems early, before they turn into a serious incident.
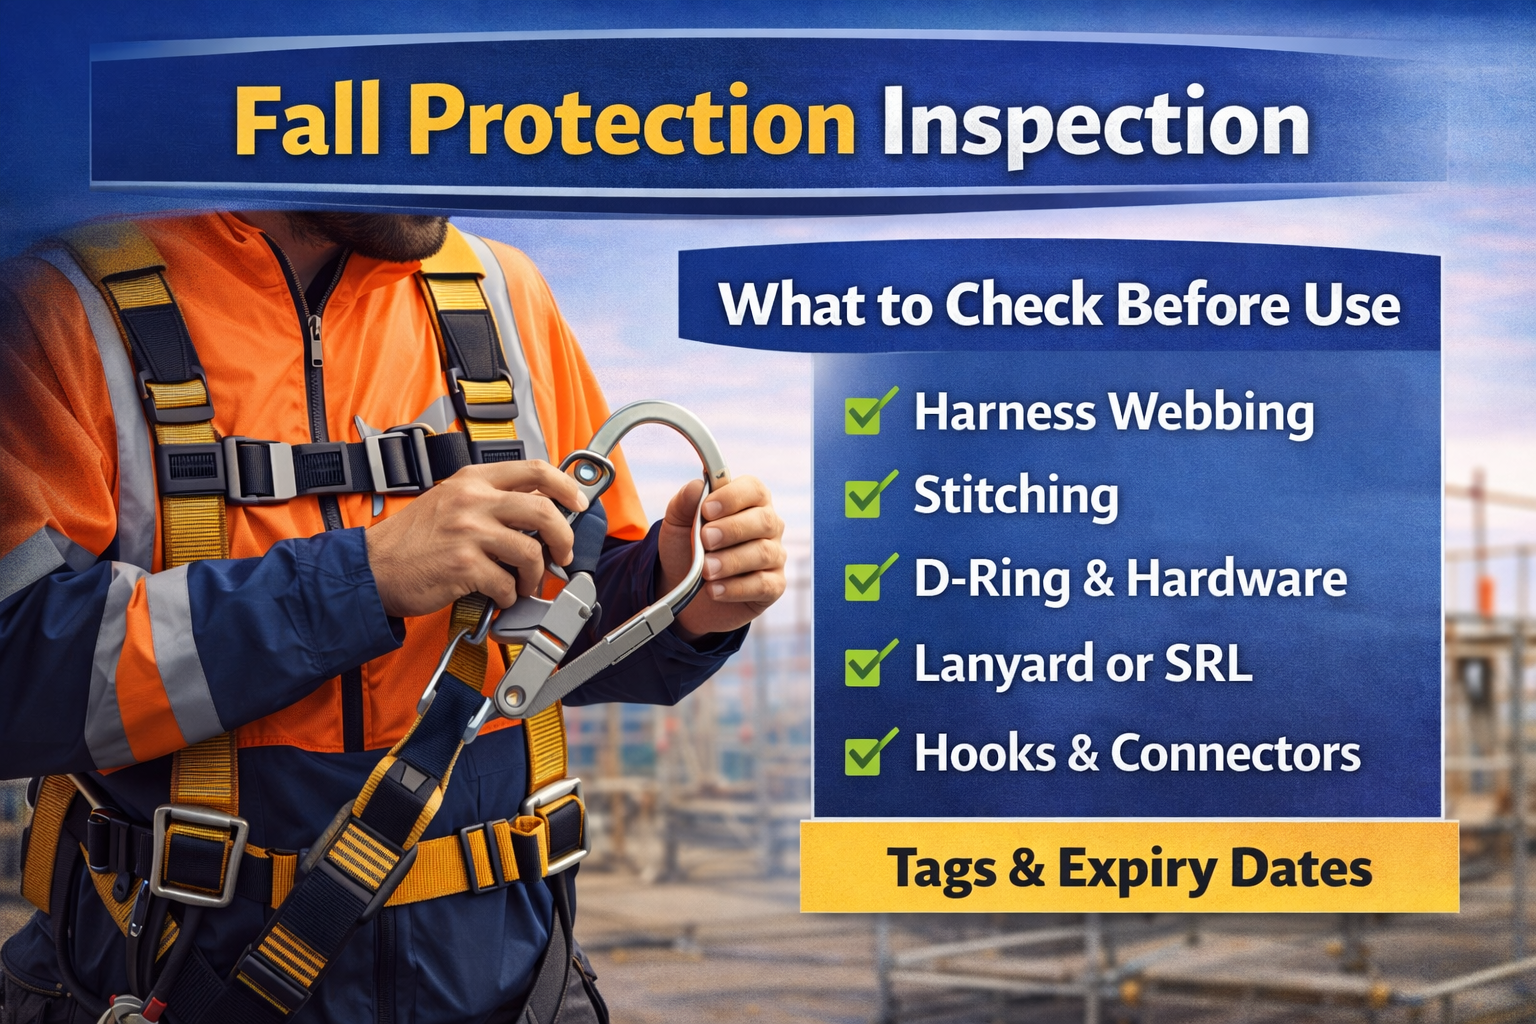
Pre-Use Checklist: What to Check Before You Clip In
1) Start with the Harness Webbing
Pick up the harness and slowly run your hands along every strap. Don’t just look — feel it.
Check for:
Cuts, fraying, or worn edges
Small tears near the buckles or D-ring area
Burn marks (welding sparks do more damage than people think)
Stiff or brittle sections (often from sun exposure)
Strange discoloration or stains (could be chemical damage)
If the webbing feels rough, thin, or unusually stiff, don’t ignore it. Webbing damage is one of the most common reasons harnesses fail.
2) Look Closely at the Stitching
Stitching is like the backbone of the harness. It holds key sections together, and it takes stress during movement.
Look for:
Loose threads
Broken stitching lines
Stitching that looks pulled or stretched
Areas where the stitching is fading or thinning
Even one damaged stitch line in a load-bearing area can weaken the harness more than you expect.
3) Check Buckles and Adjusters
This is a simple one, but it’s often skipped.
Make sure:
Buckles are not cracked, bent, or damaged
Adjusters slide smoothly
Nothing is jammed with dirt, paint, or cement dust
Buckles lock properly when you fasten them
A buckle that “kind of” locks is not safe. It should lock fully every time.
4) Inspect the D-Ring (Attachment Point)
The back D-ring is where your lifeline connects. If this part is compromised, the whole system is compromised.
Check for:
Cracks, dents, or deep scratches
Rust or corrosion
Twisting or bending
Sharp edges that could cut the webbing
Also check the webbing around the D-ring. That area is usually the first to wear out because it takes the most load.
5) Inspect Your Lanyard or Lifeline
This part takes the shock if a fall happens. So even small damage matters.
Look for:
Fraying, cuts, or abrasion
Burn marks
Knots (never use a knotted lifeline)
Loose stitching near the ends
Signs of chemical exposure (sticky, stiff, or discolored material)
If you use a shock-absorbing lanyard, check the shock pack. If it looks stretched, torn, or already deployed, it’s done. Replace it.
6) Check Hooks, Carabiners, and Snap Connectors
Connectors are small, but they are critical.
Inspect:
Cracks in the metal
Bent gates
Rust
Gate spring action
Locking mechanism function
Test it properly: open the gate, release it, and make sure it closes and locks on its own. If it sticks even slightly, don’t use it.
7) SRL Check (If You Use One)
Self-retracting lifelines are great, but they must work perfectly.
Do this quick test:
Pull the line out slowly (it should move smoothly)
Give it a sharp tug (it should lock instantly)
Listen for strange clicking or grinding
Inspect the housing for cracks or damage
If the SRL doesn’t lock instantly, it’s unsafe. Don’t “try again” and hope it works.
8) Check the Labels and Identification Tag
This is something people forget, but it matters.
Look for:
Date of manufacture
Model/serial number
Safety standard markings
Inspection record (if your company tracks it)
If the tag is missing or unreadable, the equipment may not meet compliance requirements. And if something goes wrong, it becomes hard to prove the gear was safe.
9) Look for Storage Damage and Contamination
Even if you didn’t use the gear much, poor storage can ruin it.
Check for:
Oil and grease stains
Chemical smells or discoloration
Mold, moisture, or dampness
Dirt buildup
UV fading from leaving it in the sun
Gear should be stored in a clean, dry place — not thrown in the back of a truck for weeks.
When You Should Stop and Remove Gear Immediately
Don’t overthink it. If you see any of these, the gear should be removed from service:
Cuts, tears, or heavy fraying
Broken stitching
Bent or cracked connectors
Deployed shock absorber
SRL failing the lock test
Missing tags or unknown history
This is where many accidents start: someone sees damage but uses it anyway “just for today.”
Daily Checks vs Scheduled Inspections
Your daily pre-use check is the first line of defense. It’s quick, simple, and done by the person using the gear.
But for companies managing multiple workers, scheduled inspections matter too. That’s where many professional inspection services help with documentation, compliance tracking, and deeper checks that go beyond what a quick pre-use check can catch.
Final Thoughts
A Fall Protection Inspection doesn’t need to be complicated. It just needs to be consistent. Take a few minutes before you climb, step onto a roof, or clip onto a lifeline. That quick routine can prevent serious injuries, reduce downtime, and keep your site safer for everyone.
If you want a strong safety culture on your jobsite, make this checklist part of the daily routine. And remember a Fall Protection Inspection isn’t about paperwork. It’s about going home safely.
Tags : Fall Protection Inspection